Connect Meta Ads (conversion tracking with consent)
Updated
With the Meta Ads integration, Rechnungskit reports every purchase server-side to your Meta ad account: a Purchase event with the amount for payments, and a Subscribe event when a subscription starts. The Subscribe event carries the plan amount of the first full period, even if the subscription starts with a free trial. Test purchases and test subscriptions from test mode are not reported, neither server-side nor through the browser pixel. Server events get through ad blockers and iOS tracking protection. Meta uses the events for campaign optimization, buyer audiences and lookalikes.
Do I need a cookie banner in the checkout for this? You don't build one yourself: as soon as the integration is active, Rechnungskit automatically shows a slim consent bar in the checkout. Events are only reported if the buyer clicked Accept there. The reason: the European Data Protection Board considers even collecting the click ID from a tracking link to be access to the user's device (EDPB Guidelines 2/2023, para. 50 f.), and § 25 Abs. 1 TDDDG requires consent for that. You need a privacy policy URL in your company details; without it, tracking pauses. Everything about the bar is on the help page Consent and cookie banner in the checkout (in German). For your own website and any pixel running there, your own rules still apply.
- Click on your adThe link carries the click ID (fbclid)
- Consent barThe buyer clicks Accept or rejects
- Purchase and paymentwith your payment provider
- Consent on the orderThe decision is stored with the order
- Check at sending timeAfter payment, what is stored on the order counts
 With AcceptPurchase for payments, Subscribe for subscription starts, server-side with click ID, amount, currency and UTM parameters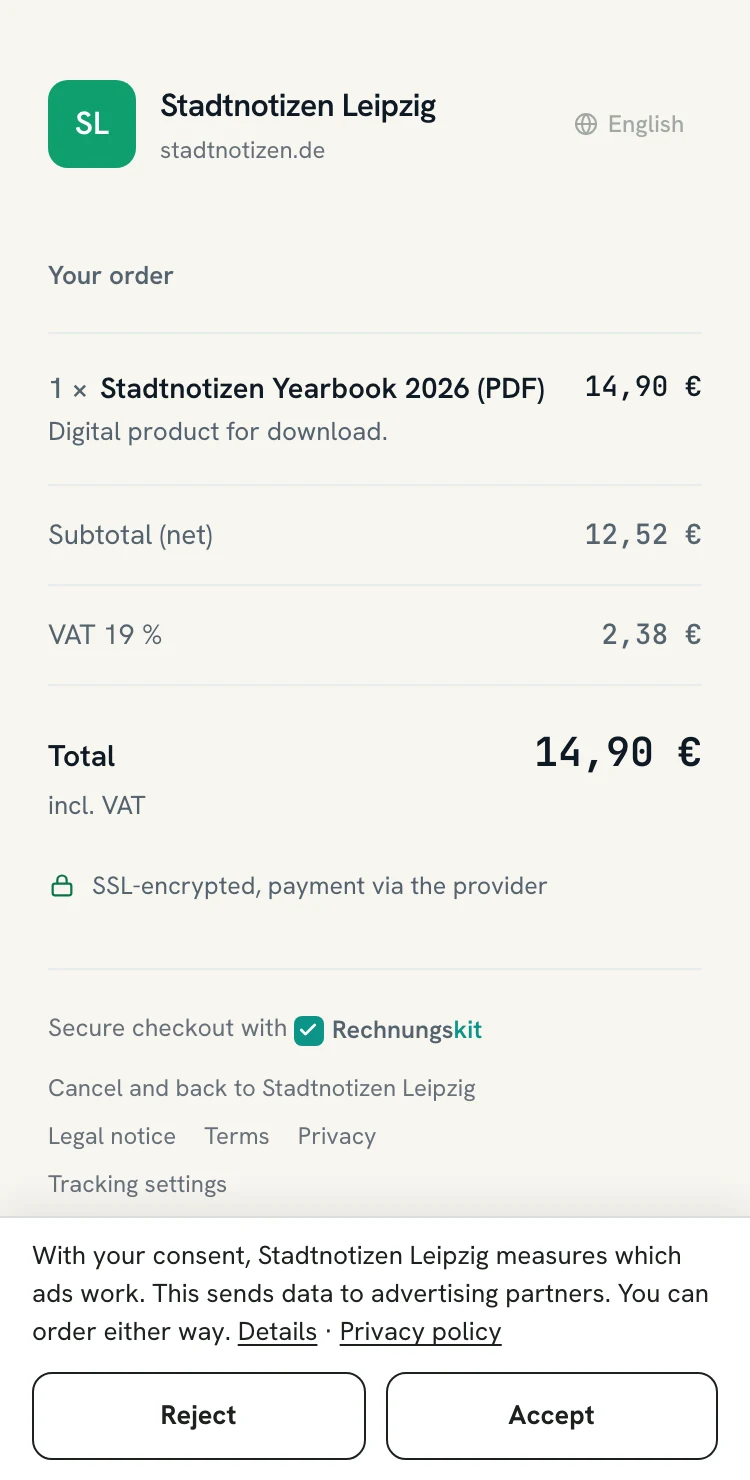
Setup
Open Meta Events Manager, choose your pixel under Data sources and go to its Settings. In the Conversions API section, generate an access token.
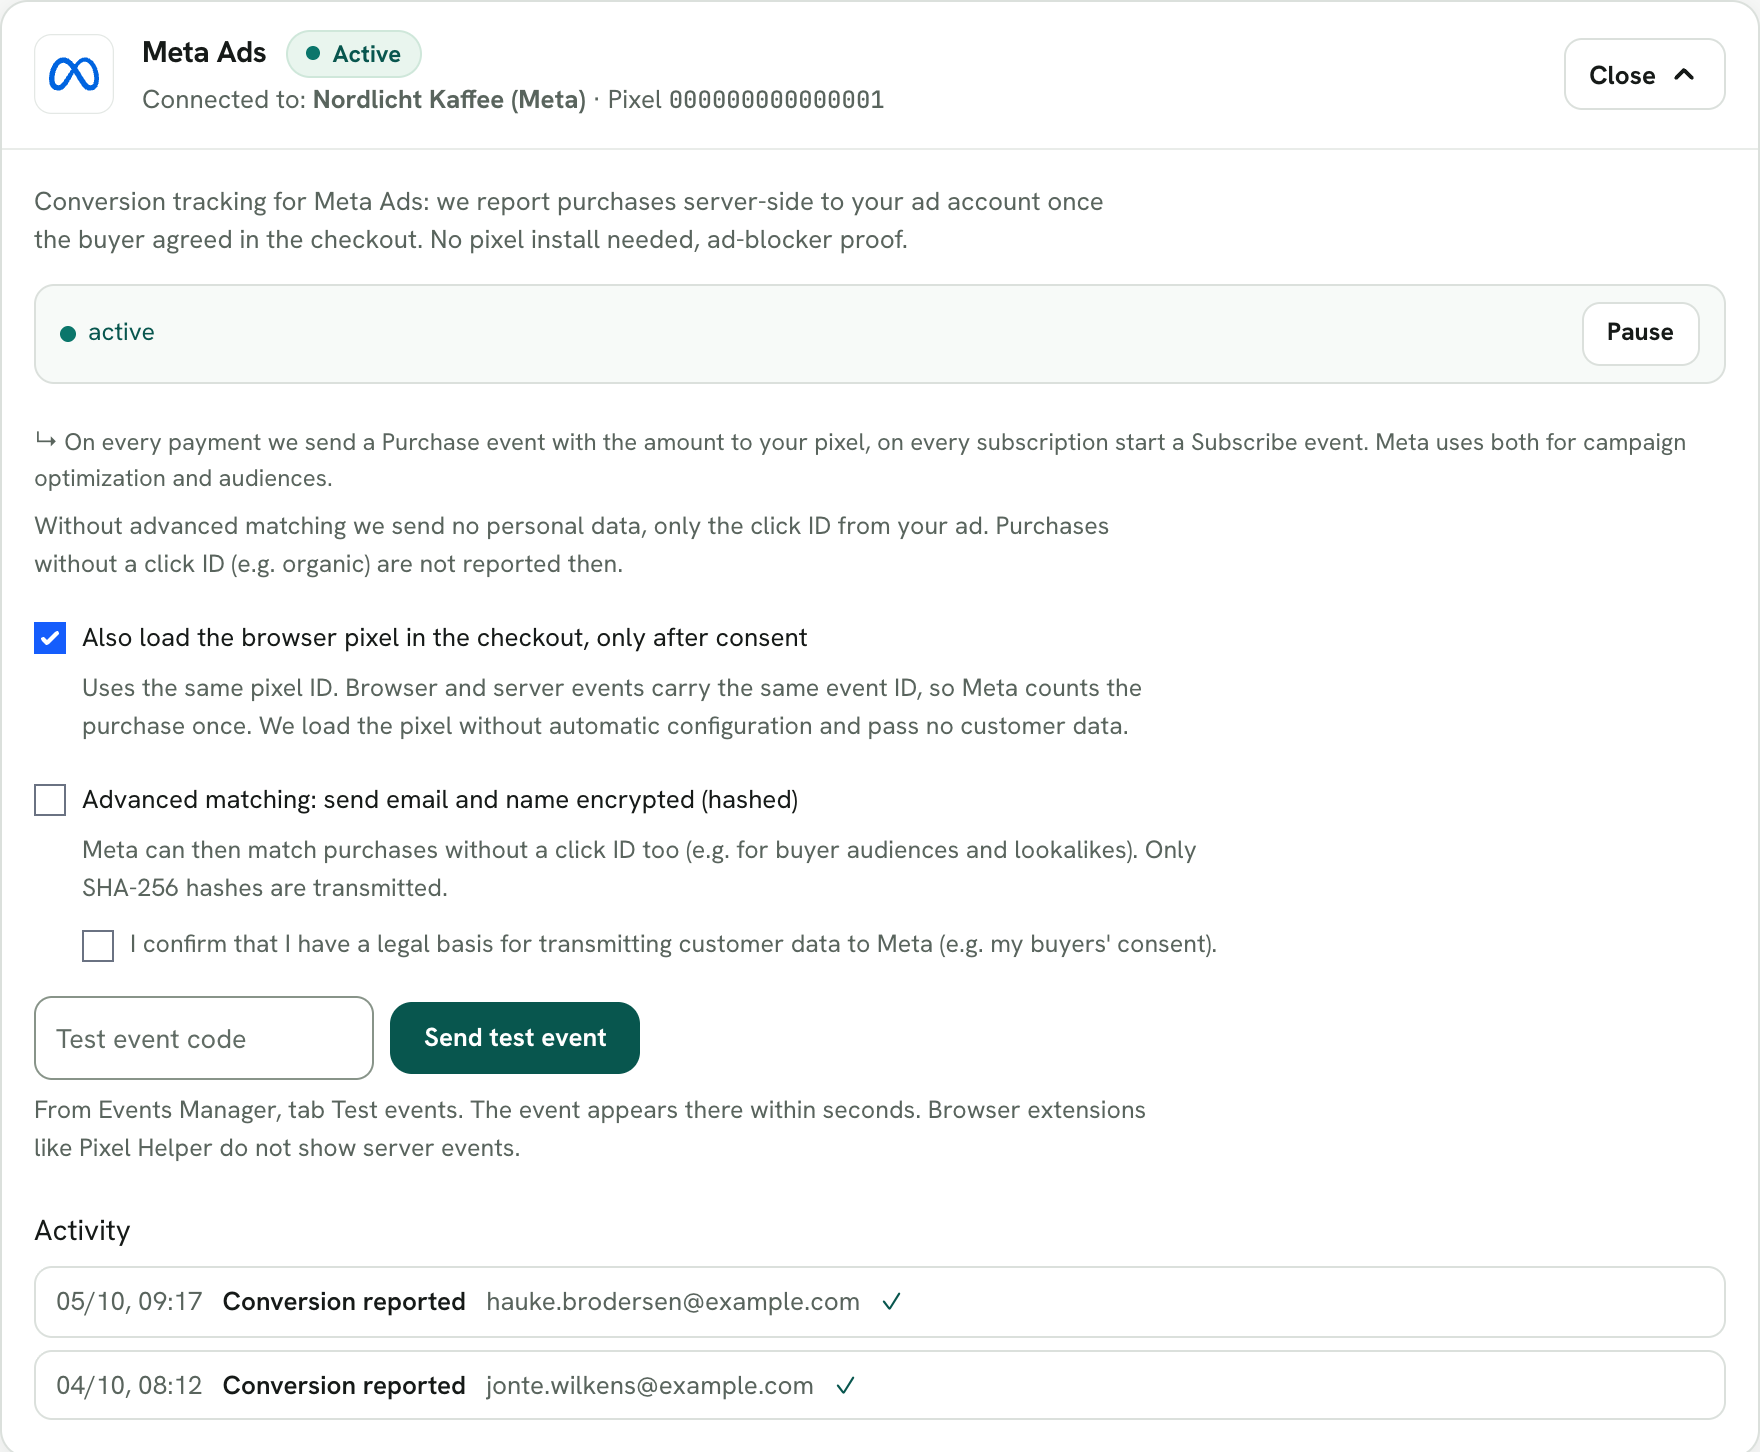
In Rechnungskit, under Connections → Integrations, click Connect on the Meta Ads card and paste the pixel ID and the token. Rechnungskit checks the connection right away and shows the pixel name, afterwards also on the collapsed card. You open the toggles, the test event and the activity log there through Settings.
Name Meta in your privacy policy and look at the preview of the consent bar on the card.
Check the chain with a test event: copy the test event code from Events Manager (Test events tab), paste it on the card and click Send test event. The event appears there within seconds. Important: browser extensions such as Meta Pixel Helper don't show server events; Events Manager is the right place to look.
What is sent
Rechnungskit only sends an event if the buyer's consent is stored on the order; it checks this at the moment of sending. Without a yes, nothing goes to Meta. By default Rechnungskit sends neither name nor email address: the event carries only the click ID from your ad (fbclid), the amount, the currency and your UTM parameters. A click ID can also be personal data as an online identifier (Art. 4 No. 1 GDPR). Purchases without a click ID, organic ones for example, are then not reported. Orders from before the switch in October 2026 have no proof of consent and are no longer reported.
Optionally you can turn on advanced matching: Rechnungskit then also sends the buyer's email and name as SHA-256 hashes (never in plain text), and purchases without a click ID are reported too, again only with the buyer's consent in the checkout. This noticeably improves buyer audiences and lookalikes. When you turn it on, you confirm that you have a legal basis for this transfer, for example your buyers' consent.
Sources: § 25 TDDDG, Art. 4 No. 1 GDPR, EDPB Guidelines 2/2023
Meta pixel in the checkout
With a toggle on the Meta card, the checkout also loads the Meta pixel in the browser, with the same pixel ID. It loads only after the click on Accept and reports PageView when the page opens, InitiateCheckout as soon as the buyer starts filling in the form, and Purchase on the thank-you page with amount, currency and the same event ID as the server event. So Meta counts the purchase only once. Rechnungskit switches off automatic configuration (the evaluation of buttons and form fields) in the code. You switch off automatic advanced matching in Meta Events Manager in the pixel's settings, because that setting lives at Meta. No pixel runs on the page with the bank details for prepayment or in the customer portal. You can use Pixel Helper here, but it only shows the browser events.
- Checkout pagePageViewwhen the page opens
- FormInitiateCheckoutas soon as the buyer starts filling in the form
- Thank-you pagePurchasewith amount, currency and the same event ID as the server eventMeta counts once
If you embed Meta tools, you may be jointly responsible with Meta (Art. 26 GDPR, CJEU C-40/17 Fashion ID). This is a note, not legal advice.
Working with your own pixel
If you also fire a browser pixel on your own thank-you page (through the return URL on the product), pass the value of the parameter rk_event_id as the event ID there. Rechnungskit uses exactly this ID for the server event, so Meta recognizes both as the same purchase and counts nothing twice. The parameter rk_order, on the other hand, is the human-readable order number for your own matching.
Every reported conversion appears in the activity log on the Integrations page. If a report fails permanently (after a token rotation, for example), you get an open task and can repeat the action with one click. If Meta is temporarily unreachable, Rechnungskit retries the report automatically for about an hour at growing intervals.
Where to find it in the app
Rechnungskit is not a tax advisory or law firm. This article explains general principles and does not replace advice from a tax advisor (Steuerberater, § 5 StBerG) or a lawyer (§ 3 RDG). Rechnungskit is built for businesses based in Germany and prepares documents, tax rates and bookings automatically. How your specific case is treated remains your decision, ideally together with your tax advisor or a lawyer.